Friday, April 8, 2011

A Home Tour

~I LOVE A PARADE!~
I've had such fun on the Parade of Homes tour this week!!  Poppies at Play held an event this week featuring four homes per day all week.  Since it is spring break, I have totally looked forward each morning to checking out all these wonderful homes!  Check out Day One....and from there you can go to each home in order.  Soooo much awesome inspiration out there!

Poppies at Play is also having a linky party for all of us "regular people" to show off our homes. While I know that there are many other homes I have seen out there in blogland that are just gorgeous right-off-the-pages-of-a-magazine-type-homes...ours surely is not.  My hubby always says I am never satisfied, never happy with how our house looks, always wanting to change things up.  And he is right. :o}

BUT.....I am so incredibly thankful, proud and BLESSED with what we have been given through the grace of God!  I told him about this home tour and he rolled his eyes....he has not come over to the dark side of blogging yet. :o}  I explained that I am very proud of our home, the one he and I have created together, and even though I will never, ever stop wanting to make it better, I want to share it with others.  While I know that there are plenty of other homes that will be far more worthy of being shown off, I hope that some of you will find inspiration in our home.  I know I cannot wait to visit all the others who come to the party!  So here we go........

~WELCOME!~
Our home was built by John Weiland in 1998.  We live in a swim/tennis community in the suburbs of Atlanta.  We have a corner lot, which gives us a HUGE front yard.  I like to think that our home has lots of curb appeal. 

~THE MAIN FLOOR~
The Foyer~

These black and white paintings in our foyer show all the homes we have loved in our 23 years of marriage!

The Living Room~
This room and the dining room (next photo) were carpeted until our master bath flooded causing damage to the main level hardwoods.  So we had hardwoods installed while the damaged floors were being refinished.  No rugs in these rooms yet, except for this little rug that will eventually go in the foyer....lots of brown...can't wait for rugs! :o}
The Dining Room~

The Powder Room Bath~
Recently painted this room a gray-blue color...jury is still out on that....

The Kitchen~

 The Family Room~
The kitchen and family room are really one big room.  And the rug in here was ruined with the water damage, so I am also patiently waiting for a rug here too!  Our built-ins and fireplace have changed drastically from what they originally looked like.  You can read more about that here.


~THE SECOND FLOOR~
Girl #1's Room and Bath~
Just recently made over....a blog post on that coming soon.


Girl #2's Room and Bath~
Blog post on her room, which was made over last October, also coming soon.


The Office~
Hubby works from home (when he is not traveling) so this space is not for show....it is a real working office!
The Master Bed and Bath~
Feeling the itch to update our bedroom...gathering ideas in blogland right now. :o}
Our master bath got a major overhaul last October due to an overflowing toilet....you can see/read more about that here.
We also have a guest room and our laundry room on this level....two rooms that are NOT ready for photos...both rooms end up being a dumping ground for laundry, out-of-season clothes, and various other junk...I mean stuff! :o}

~THE BASEMENT~


The Theater Room~
The Game Table/Room~
**Are you sensing a theme in our basement?**  If not....here is another hint....GO DAWGS!  :o}
The Kitchen/Bar~
The Bath~
The Craft Room~
This room is all mine and I LURVE her! We revamped this room in January. You can read more about it here.


I hope you enjoyed looking around our home!  Y'all come back now! :o}
Blessings to All~


FUN Shirts!

It seems like many of my posts mention my friend D'Ann. That is because she is my creative muse! She and I find ideas and feed off one another. And this post is no different. D'Ann made the cutest shirt for her daughter Hallie while Hallie was a student in my class. D'Ann is always making something cute for Hallie to wear, and poor Hallie knows if I see her around and about our school, I am going to stop her so I can ooh and aah over D'Ann's latest creation. She also knows what happens next...I am calling up her mama asking "who, what, where and how" so I can re-create what she has made!  These cute shirts are no exception.  I have two important little girls that have birthdays in April, and these shirts were perfect gifts for them last year.  I have since made a couple more that are school spirit wear shirts.  BOBCATS is the mascot for our school, and I got my creative thinking cap on and came up with a fun design.  Then my good friend Jennifer was moving to a new school and I knew she didn't have any spirit wear items, so I cooked up a shirt plan for her too!  I must say....these shirts are time-consuming and truly a labor of love!  I have been approached by several people asking to buy one, I just can't do it!  BUT ~ Dawn and Marsha ~ if you are reading this, I do promise to make yours...soon. :o} 


Wanna try this yourself???  Here are some tips....I used a variety of felts, fabric, rickrack, and embroidery floss. I started by ironing the fabric/felt to a fusing material...I used Steam-A-Seam from HobLob, but there are other less expensive options out there that I would use if I did this again.  I drew the letters and parts onto the back of the iron on material...you have to draw it backwards so it will not be backward when you turn it to the right side.  I placed and ironed on all the letters (except for the rickrack letters, and for those, you just have to leave a little space for it).  Then I used a cross-stitch hoop to keep the fabric semi-taut.  The stitching part is easy, but slow-going!  You can see for some letters I used my sewing machine and zigzagged around them.  I am not very good at zigzagging, so these letters were the hardest for me!   Lastly, I sewed on the rickrack letters.  These are difficult and they don't look very good until you iron them down.  These shirts have washed very well....and I lay mine flat to dry.  It looks as good as the day I made it!

Thank you again to my creative friend D'Ann....who deserves all the credit for this cute idea! :o}
I'm sharing at these great linky parties~
Funky Junk's Sat Nite Special
UndertheTableandDreaming
 http://linda-coastalcharm.blogspot.com/
Photobucket

Thursday, April 7, 2011

Spring Things

So spring is happening around our house.  Since we have been on spring break this week, I have had the chance to pull out some old favorites.  {....and I just might have added some fun new finds}  It is dangerous around here when I have no place to go and practically everyone in town has gone away for the break.  I am left here, by myself, with nothing to do.....except shop! hee hee :o}

Here is a look at a few of the pretties I have added around the house this week....


Happy Spring Everyone! 
I am sharing my Spring Things at these great blogs~


Funky Junk's Sat Nite Special

UndertheTableandDreaming
 http://linda-coastalcharm.blogspot.com/
Photobucket

If These Walls Could Talk....

 
....maybe they would tell me how to get this Mason jar out of this hole!  We moved into our home 12 years ago.  My mom and I picked up three Mason jars to use in the new kitchen decor.  We were placing them in a little vignette on top of the cabinets, when one fell over into a weird triangular hole where the wall angles, leaving space at the back of the cabinets.  It did not break....and this dusty Mason jar has made its home here for all these years.  You can see some "fishing gear" down there on top of it where my silly girls cooked up a plan about 5 years ago to help me get the jar out.  It involved a pair of striped Halloween tights tied to a crab net....and yeah, it didn't work! LOL!

So here is how we use the remaining two Mason jars in the kitchen nowadays...
...and this little girl knows exactly where they are and exactly what they are for!  :o}


So, anyone have any ideas for how to get that Mason jar out of the hole???  Any and all ideas are welcome!

Sharing my dilemma with the fine folks who visit Funky Junk Donna's Saturday night special on Mason Jars  :o}


Funky Junk's Sat Nite Special

Saturday, April 2, 2011

Burlap & Button Flowers

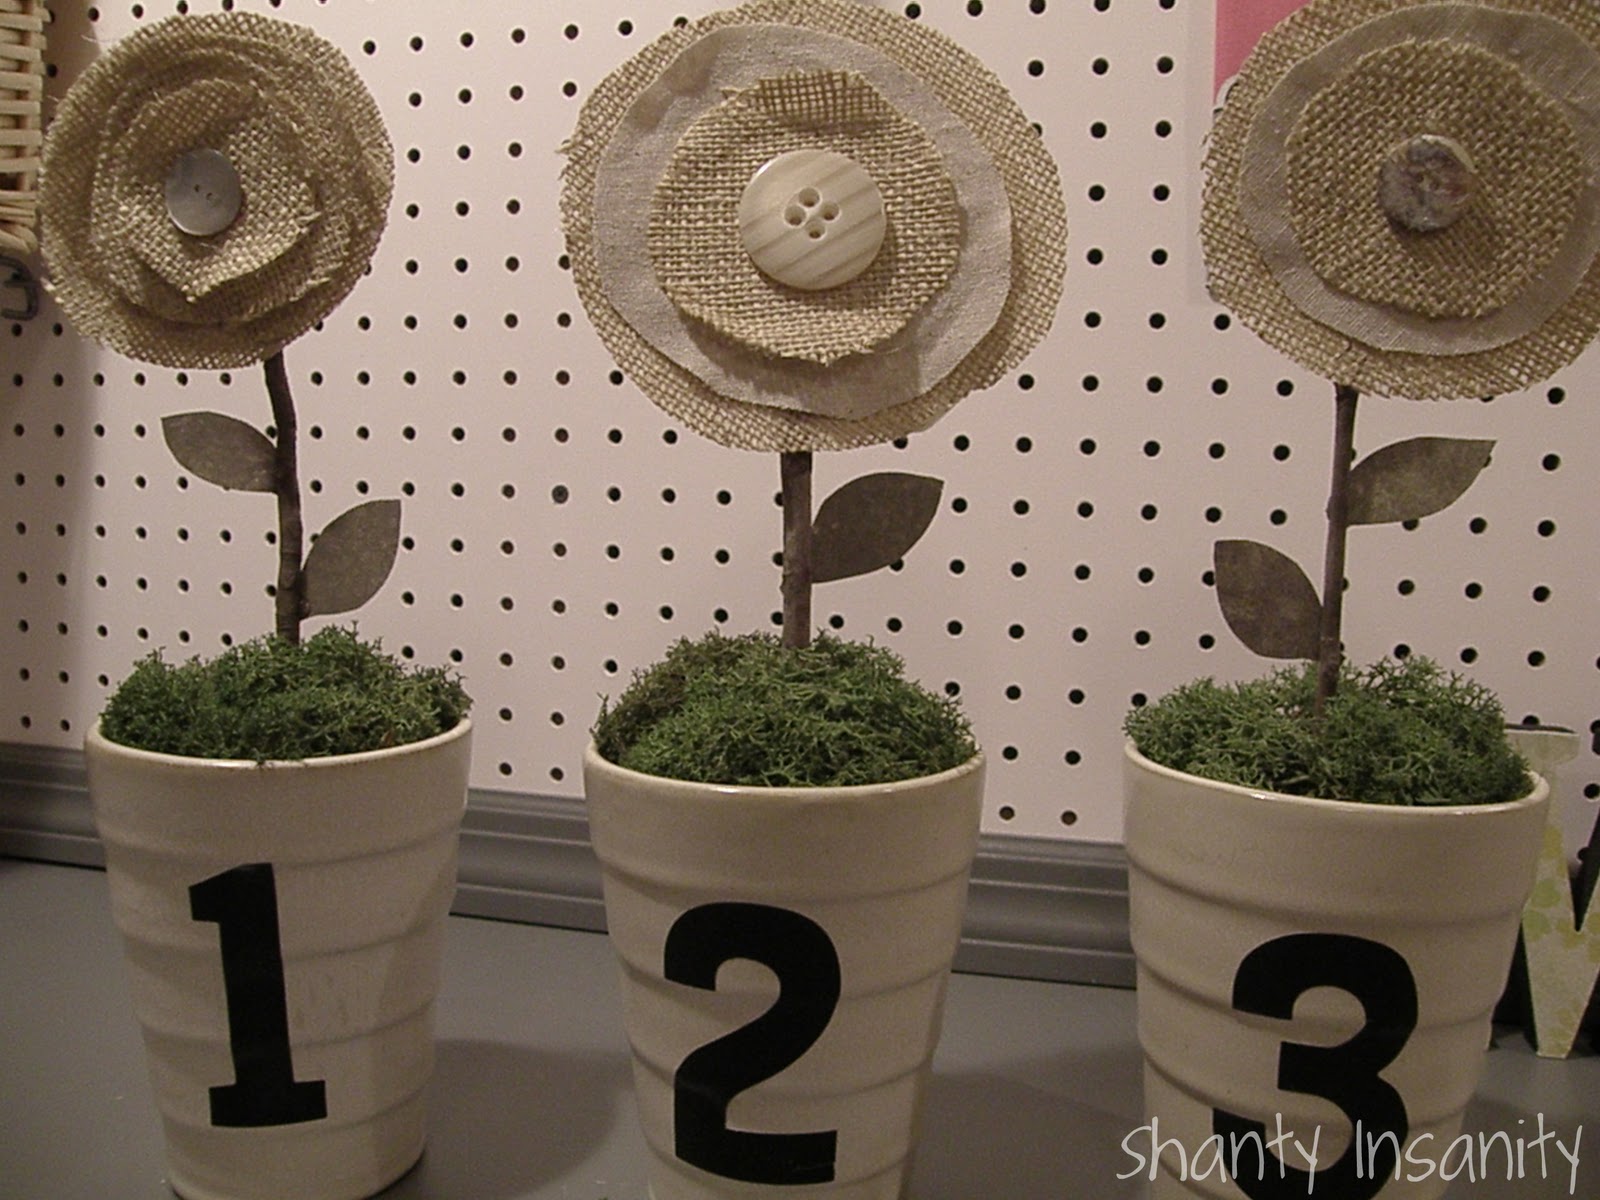
My good friend D'Ann gave me these adorable numbered pots for Christmas.

They were filled with lovely poinsettias throughout the holidays.  I couldn't decide how I wanted to use these precious pots after the poinsettias wilted away.  D'Ann was using hers to plant herbs for her kitchen windowsill.  I thought I would just copy her, but then I saw these creative flowers made of burlap and buttons at Mudpies and Marigolds.

They were exactly the flowers I needed....flowers made of one of my favorite fabrics ever, and more importantly, these flowers cannot be killed!  I envy all who have a green thumb...I can just look at a live plant the wrong way and it'll be dead within 24 hours! :o}

So I set to work to make these fun little flowers.  I cut free-form circles of burlap and some muslin fabric I had. Then I stacked them hot-gluing between the layers. 
The next step was to add a felt backing to keep the flowers sturdy and finish off with a button center.

I used little twigs I gathered from the backyard to make my stems and some green scrapbook paper to cut some leaf shapes.  Each stem was hot-glued to the felt backing.


Pretty cute little flowers, huh?
I stuck the stems down into styrofoam in the pots and covered them with moss. And lastly, I added the little leaves.
 Here they are...pretty little flowers all in a row!

And here is where they live now.  These little flower pots do not require any extra special care from me {well....except for a little dusting here and there}and I love the addition of some numbers on our family room built-ins!

I just love me some burlap and this little burlap project was quick and easy.  Fun, huh?

Linking up to these great parties:


Funky Junk's Sat Nite Special


UndertheTableandDreaming

 http://linda-coastalcharm.blogspot.com/

Photobucket